|
--- |
|
slug: access-astra |
|
title: Access Astra Board |
|
authors: [asahu] |
|
tags: [connect,access] |
|
--- |
|
|
|
# Guide to access Astra Machina Dev Board |
|
This tutorial will guide you through the steps required to access a Astra Machina Dev Board. |
|
|
|
We can access our Astra Machina Board using: |
|
|
|
|
|
**1. Using ADB on Host Machine** |
|
|
|
**2. Using Tera Term / Putty on Host Machine** |
|
|
|
**3. Using Wayland Terminal on Astra Board** |
|
|
|
## 1. ADB |
|
|
|
### Connect to your board |
|
|
|
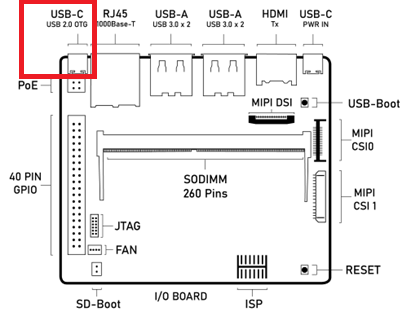
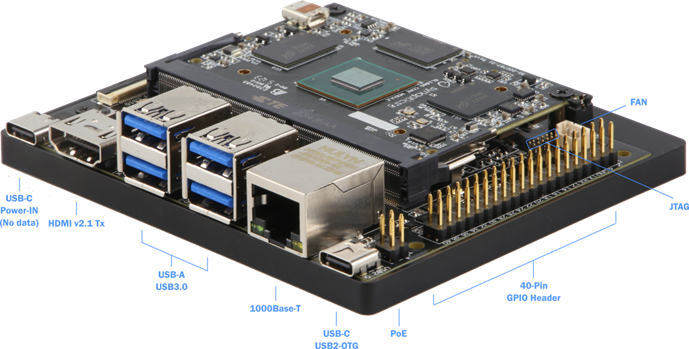
To communicate with your board via Android Debug Bridge (ADB) first connect a USB cable from your dev machine to the USB C port on the board marked "USB-2.0". |
|
|
|
 |
|
|
|
:::warning |
|
The other USB-C marked PWR_IN should be connected to the power supply - make sure you get them the right way around! |
|
::: |
|
|
|
|
|
If you don't have ADB,it can be installed as part of [Android SDK Platform-Tools](https://developer.android.com/tools/releases/platform-tools#downloads). You should then be able to open a MacOS, Linux or Windows shell inside folder `platform-tools` and run: |
|
|
|
```bash |
|
adb devices |
|
``` |
|
|
|
You can check if the Synaptics Astra board is attached: |
|
|
|
<pre>List of devices attached |
|
SL16x0 device</pre> |
|
|
|
See the [user guide](https://synaptics-astra.github.io/doc/v/0.9.0/linux/index.html#the-shell-with-adb) for more information on ADB. |
|
|
|
|
|
### Copy across the sample image |
|
|
|
First, copy the example image from your dev machine to the board: |
|
|
|
``` |
|
adb push ~/Downloads/expanse.jpg /home/weston/expanse.jpg |
|
``` |
|
|
|
### Start a shell session |
|
|
|
Then start a shell session: |
|
|
|
``` |
|
adb shell |
|
hostname |
|
``` |
|
|
|
You should see the prompt has changed and the board responds with a hostname: |
|
|
|
<pre> |
|
sh-5.1# hostname |
|
sl1680 |
|
</pre> |
|
|
|
|
|
## 2. Tera Term / Putty |
|
|
|
### Connect to your board |
|
|
|
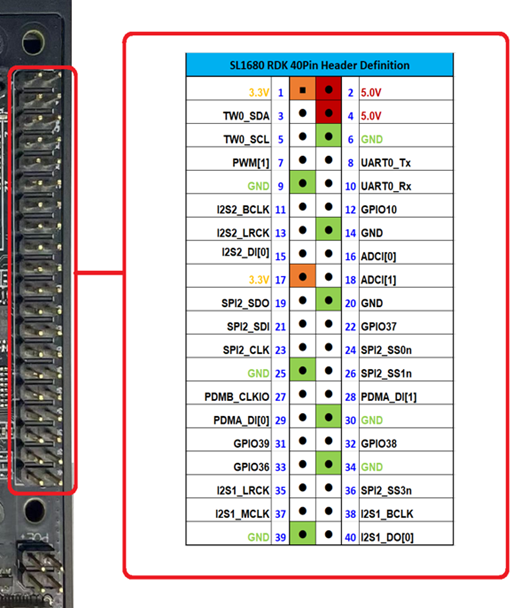
To communicate with your board via Tera Term or Putty first connect a **UART** from your dev machine to the GPIO Header of the board following this image: |
|
|
|
**VDD -> Pin 1 , GND -> Pin 6 , TX -> Pin 8 and RX -> Pin 10**. |
|
|
|
|
|
 |
|
|
|
|
|
### Tera Term settings |
|
|
|
Open Tera Term: New connection then Select Serial -> Port: 'COM$: Silicon Labs CP210x USB to UART Bridge' |
|
|
|
Go to 'Setup' and Open 'Serial Port' |
|
Then set 'Speed' -> '115200' and Click 'New Open' |
|
|
|
|
|
### Copy across the sample image |
|
|
|
Once in Tera Term is setup, Get the Inet address of your Astra Machina Board from here. |
|
<!-- ```bash title="ADB_Terminal" class="no-copy-prompt" |
|
sh-5.1# ifconfig eth0 | grep "inet addr" --> |
|
```bash |
|
ifconfig eth0 | grep "inet addr" |
|
``` |
|
Copy the example image from your dev machine to the board using `scp ` to Machina board: |
|
|
|
```bash |
|
scp ~/Downloads/expanse.jpg root@10.3.10.132:/home/root |
|
``` |
|
|
|
|
|
## 3. Wayland Terminal |
|
### Connect to your board |
|
|
|
Connect the Power supply in USB-C marked **PWR_IN**. |
|
|
|
Astra Machina’s graphical desktop is enabled be default. It can be displayed on an external display connected to the HDMI port or a MIPI display. |
|
|
|
|
|
Input can be provided by connecting a standard USB keyboard and mouse. |
|
|
|
 |
|
|
|
:::warning |
|
HDMI is currently not supported on SL1620 |
|
::: |
|
|
|
### Wayland Desktop |
|
|
|
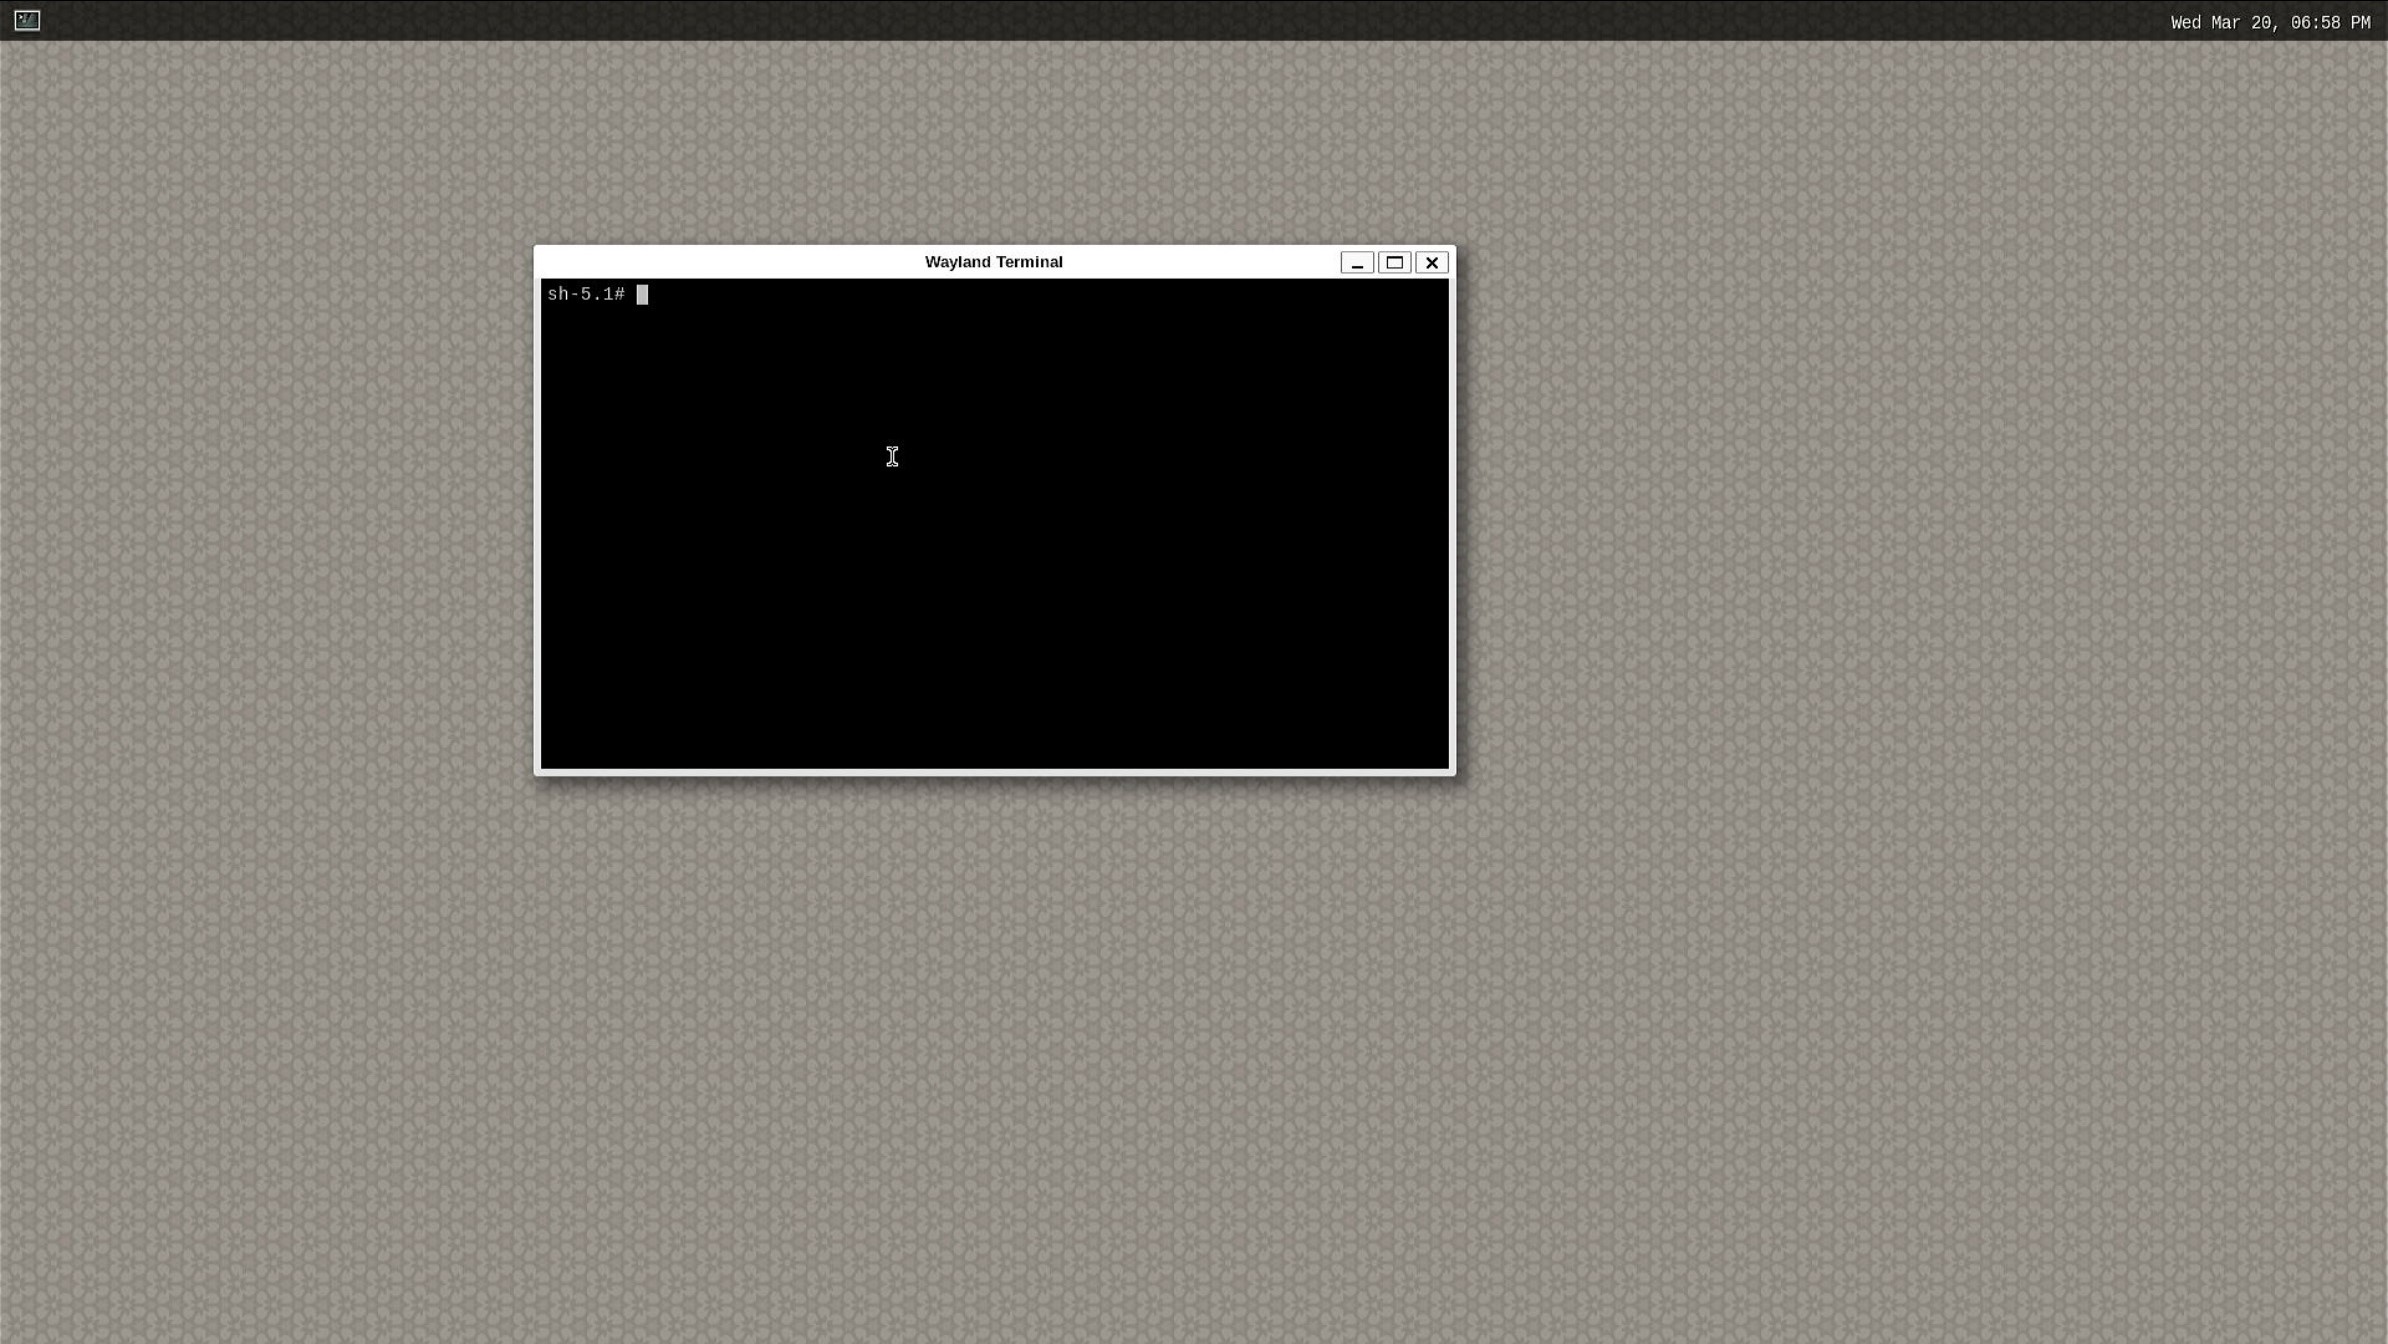
Clicking on the icon in the top left corner will open a terminal. |
|
|
|
 |
|
|
|
|
|
|

