Spaces:
Running

title: LLMBB Agent
emoji: 📈
colorFrom: yellow
colorTo: purple
sdk: docker
pinned: false
license: apache-2.0
app_port: 7860
中文 | English
![]()
Qwen-Agent is a framework for harnessing the tool usage, planning, and memory capabilities of the open-source language model Qwen. Building upon Qwen-Agent, we have developed a Chrome browser extension called BrowserQwen, which has key features such as:
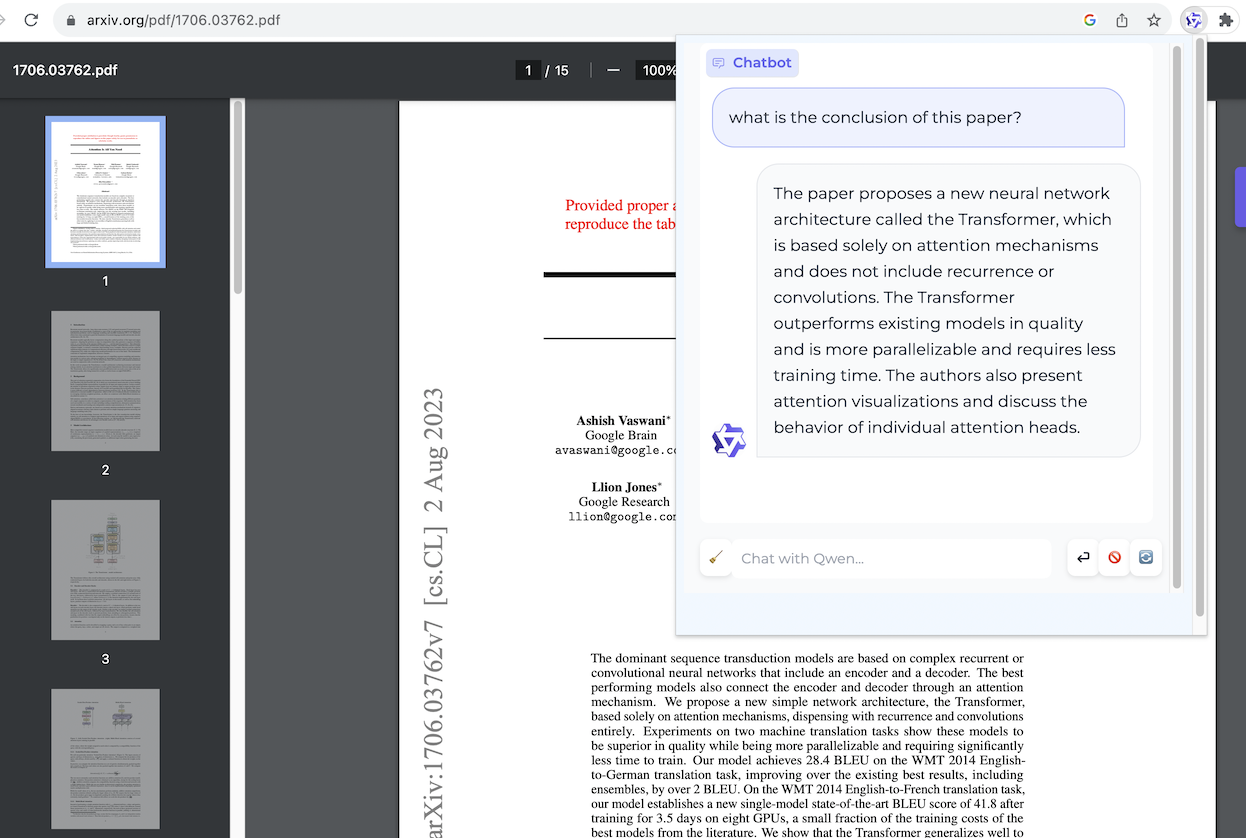
- You can discuss with Qwen regarding the current webpage or PDF document.
- It records the web pages and PDF/Word/PowerPoint materials that you have browsed, with your permission. It helps you understand the contents of multiple pages, summarize your browsing content, and automate tedious writing tasks.
- It supports plugin integration, including Code Interpreter for math problem solving and data visualization.
Use Case Demonstration
If you prefer watching videos instead of screenshots, you can refer to the video demonstration.
Workstation - Editor Mode
This mode is designed for creating long articles based on browsed web pages and PDFs.
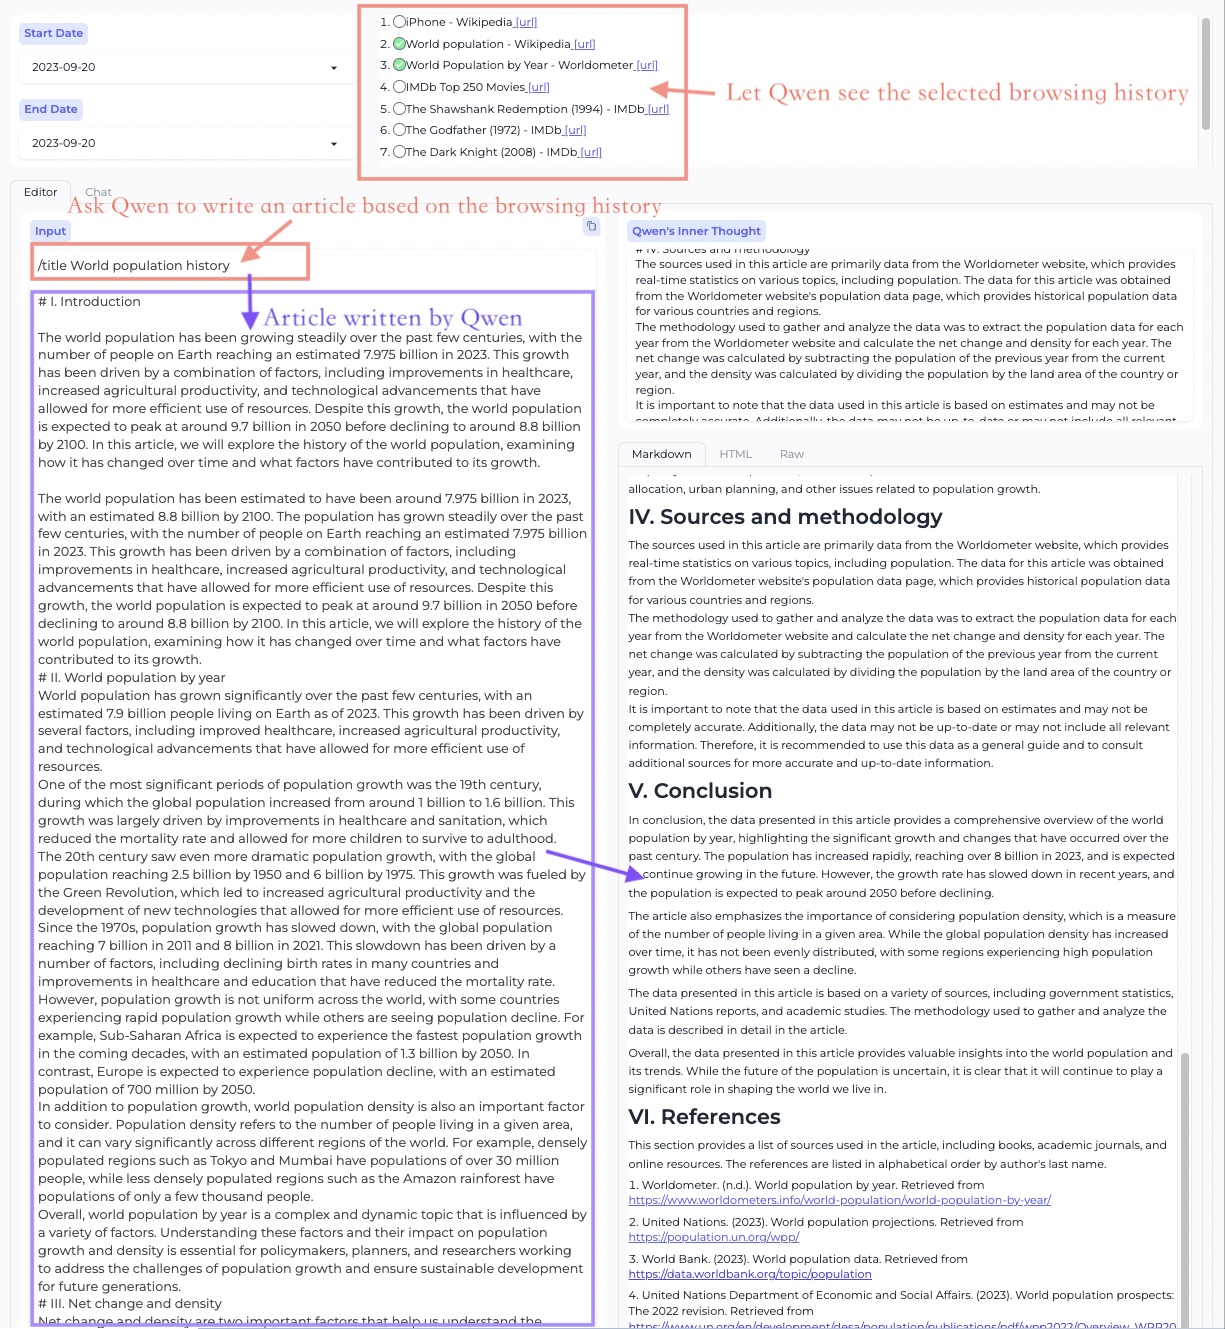
It allows you to call plugins to assist in rich text creation.
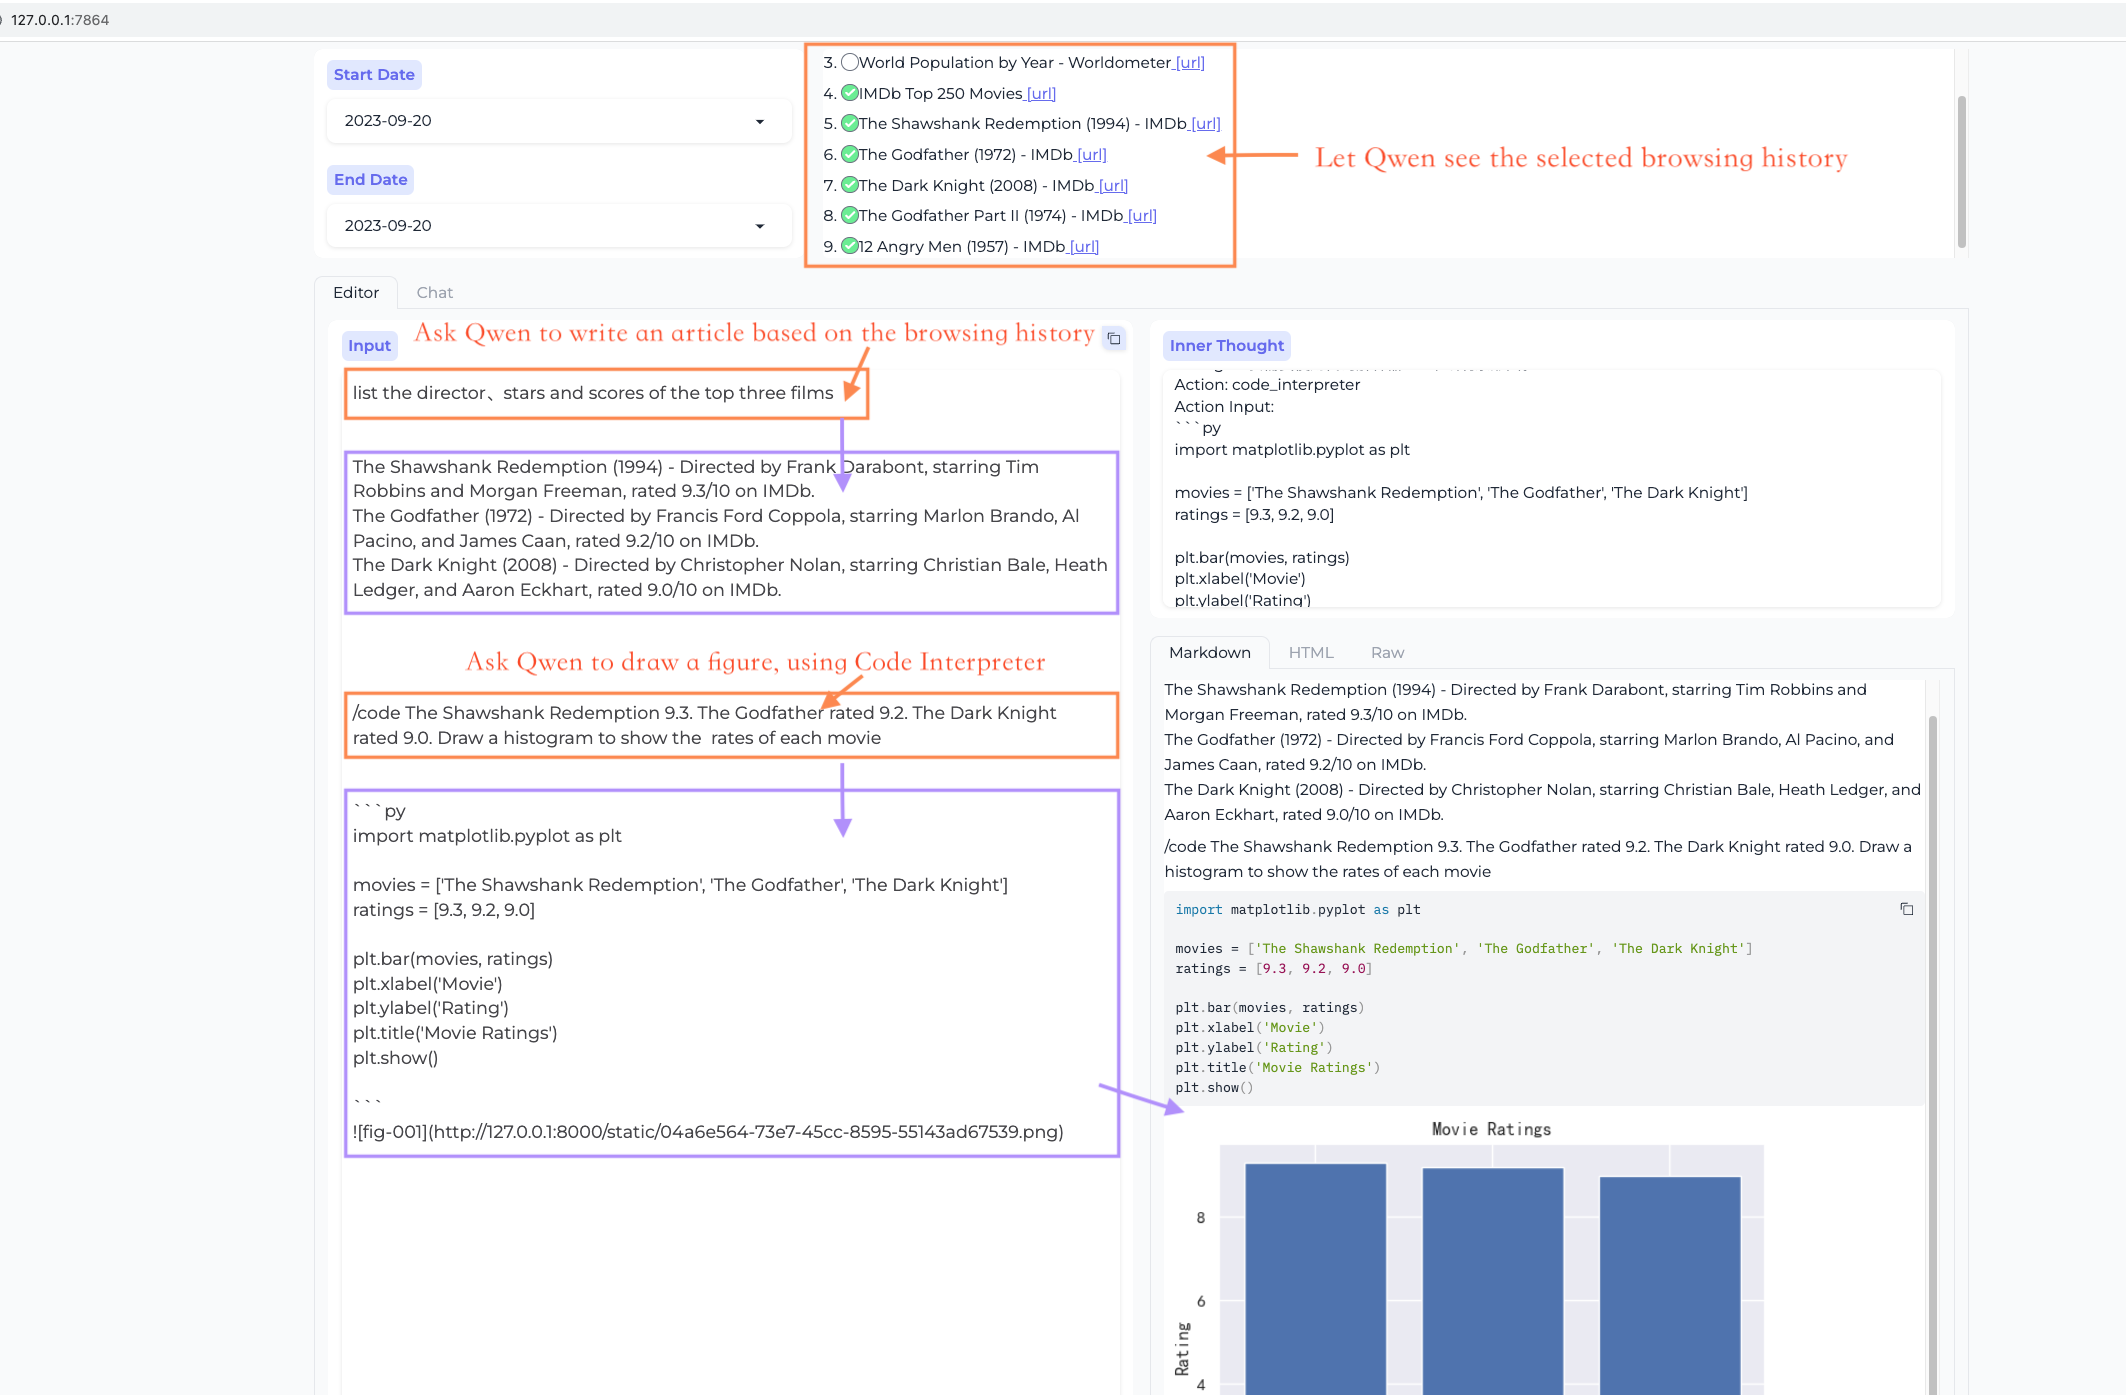
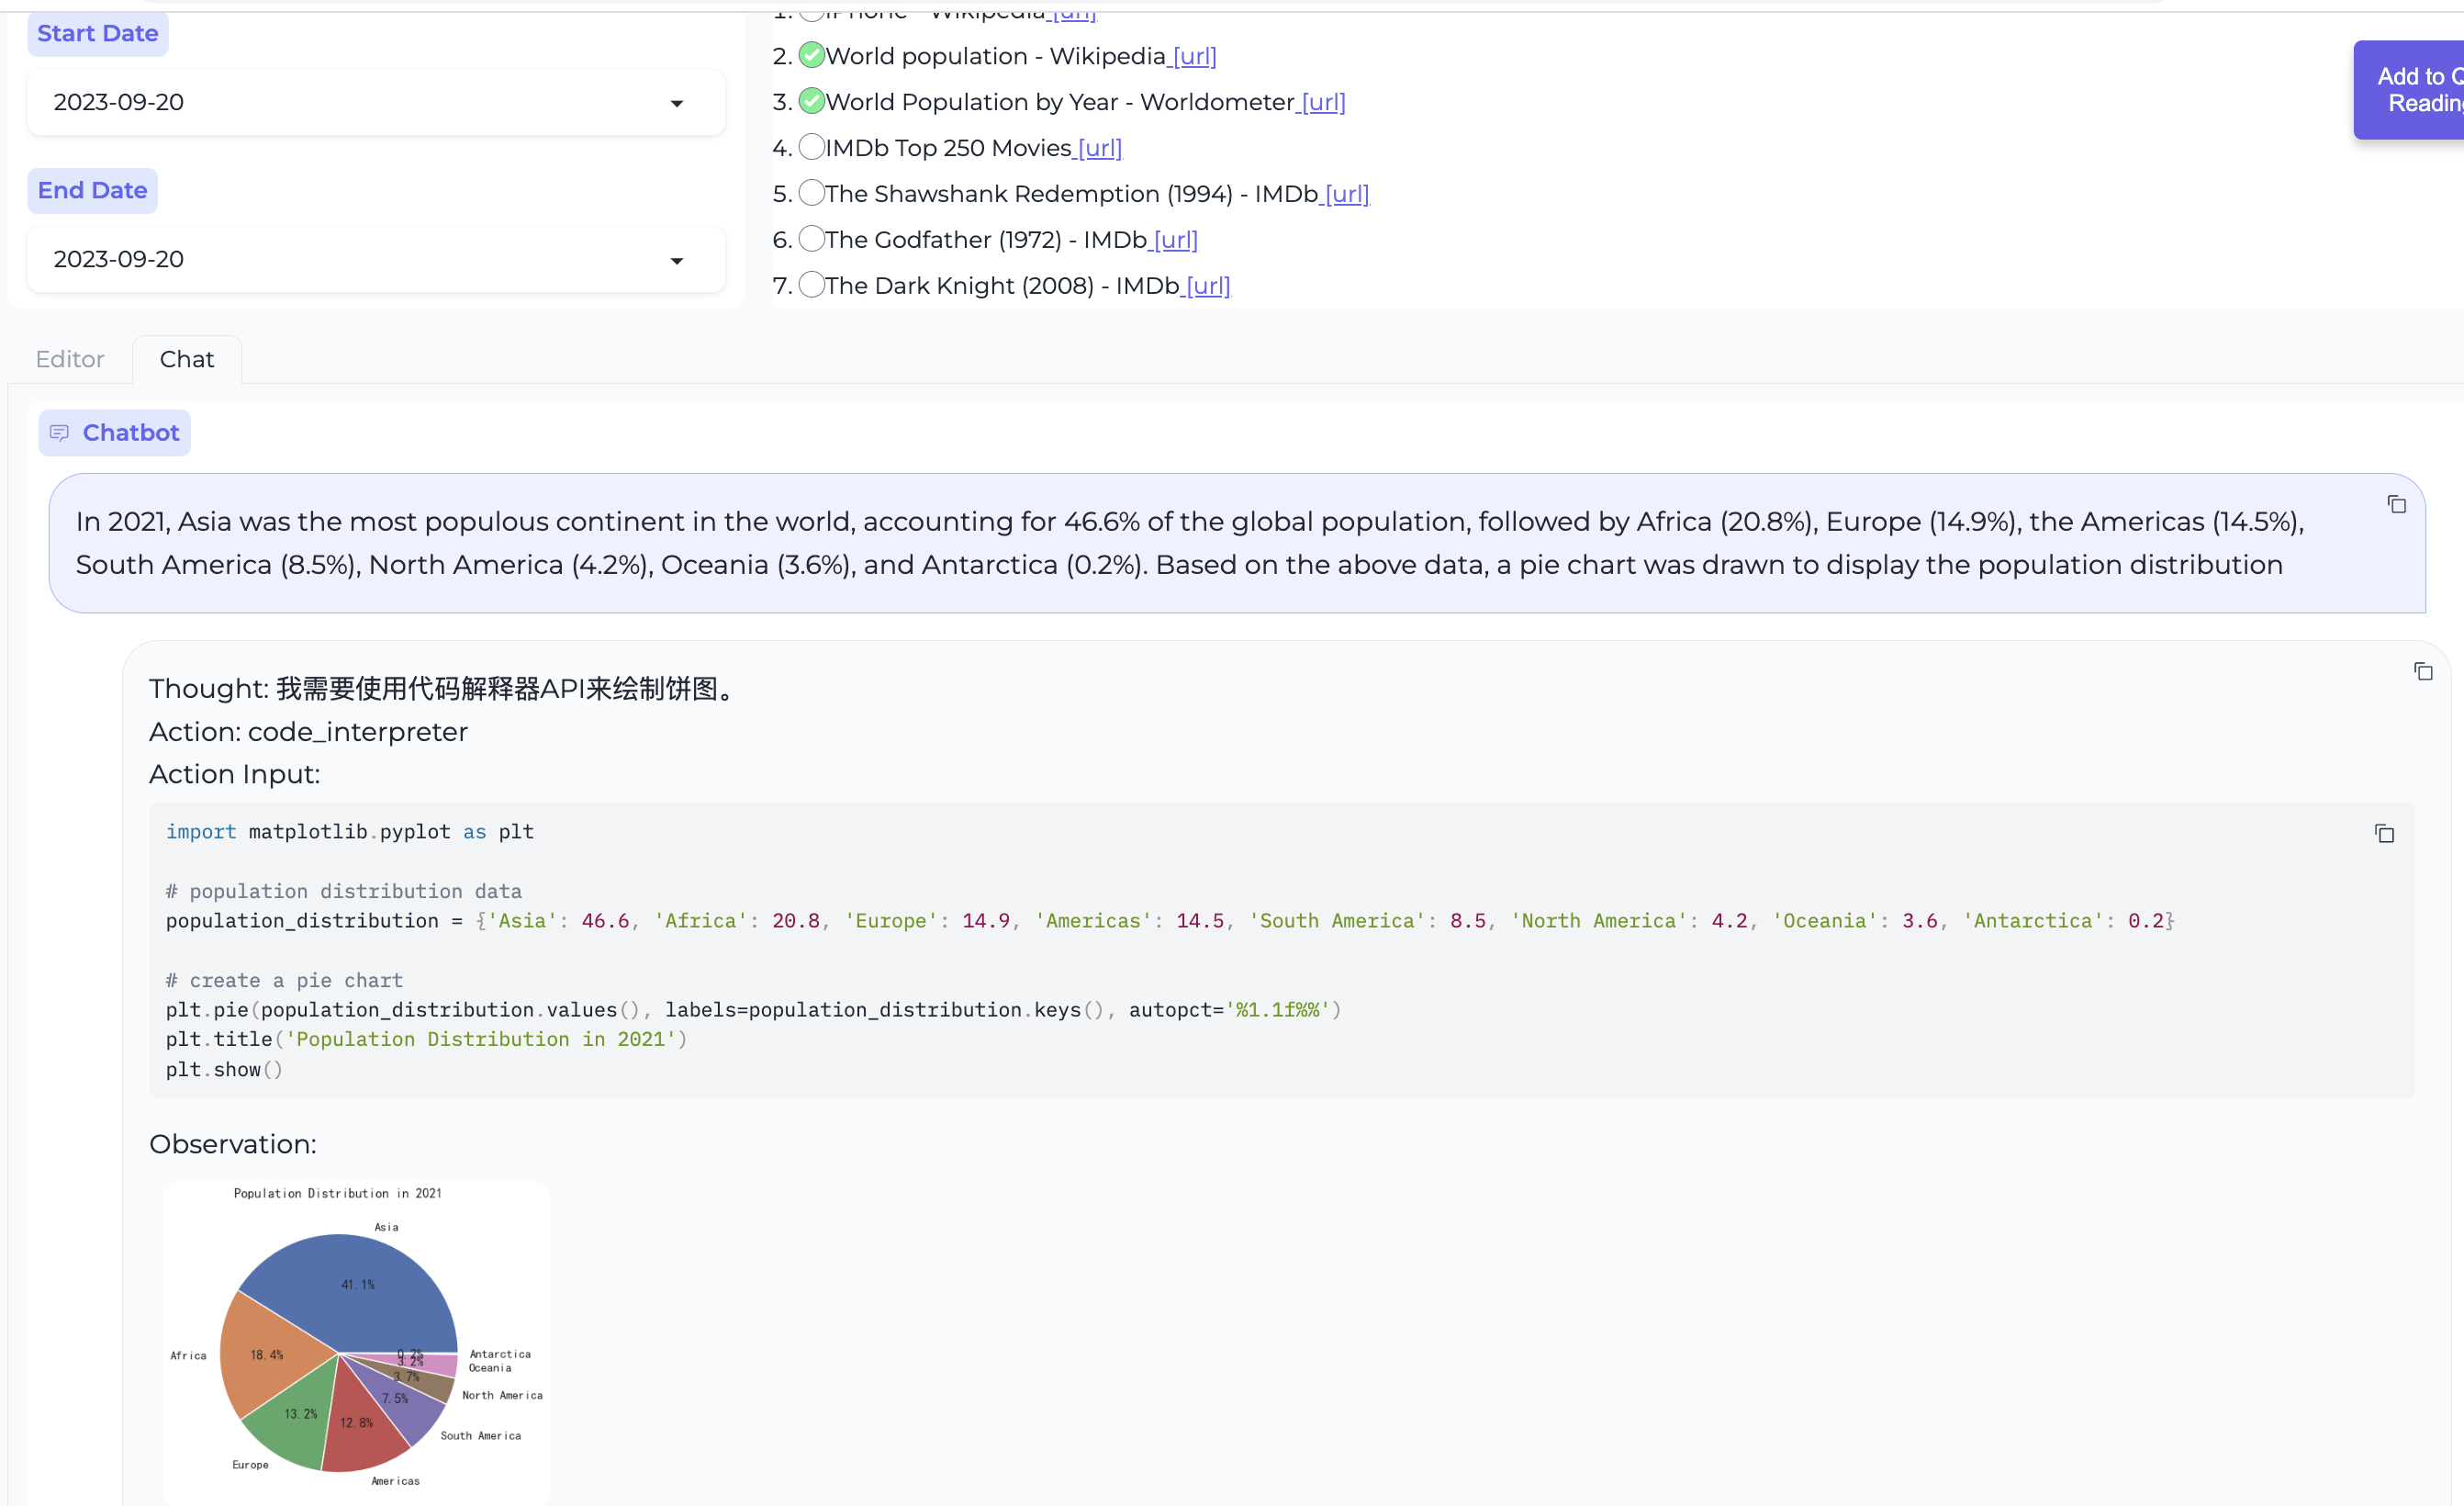
Workstation - Chat Mode
In this mode, you can engage in multi-webpage QA.

Create data charts using the code interpreter.
Browser Assistant
Web page QA
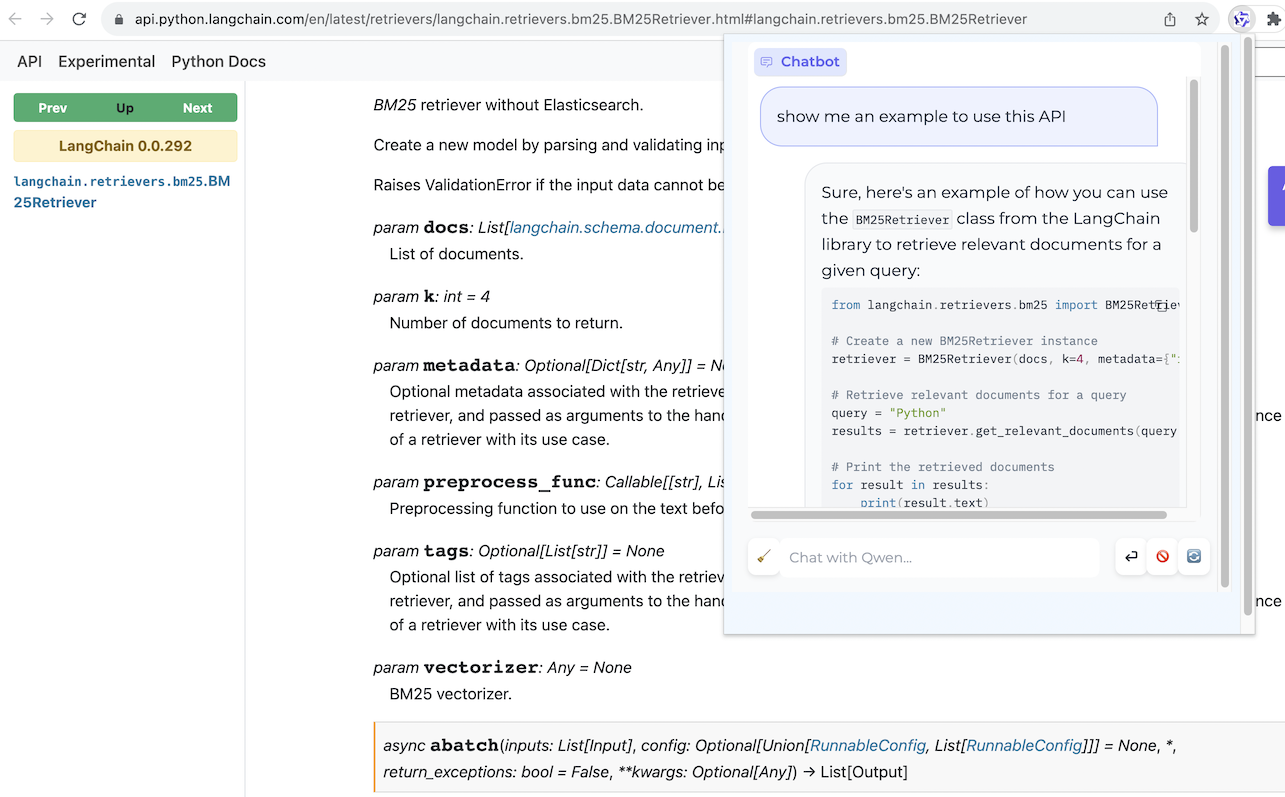
PDF document QA
BrowserQwen User Guide
Supported platforms: MacOS, Linux, Windows.
Step 1. Deploy Model Service
You can skip this step if you are using the model service provided by DashScope from Alibaba Cloud.
However, if you prefer to deploy your own model service instead of using DashScope, please follow the instruction below, which is provided by the Qwen project, to deploy a model service compatible with the OpenAI API:
# Install dependencies.
git clone git@github.com:QwenLM/Qwen.git
cd Qwen
pip install -r requirements.txt
pip install fastapi uvicorn "openai<1.0.0" "pydantic>=2.3.0" sse_starlette

# Start the model service, specifying the model version with the -c parameter.
# --server-name 0.0.0.0 allows other machines to access your service.
# --server-name 127.0.0.1 only allows the machine deploying the model to access the service.
python openai_api.py --server-name 0.0.0.0 --server-port 7905 -c Qwen/Qwen-14B-Chat
We can specify the -c argument to load the Qwen models listed on Qwen's Hugging Face page, such as Qwen/Qwen-1_8B-Chat, Qwen/Qwen-7B-Chat, Qwen/Qwen-14B-Chat, Qwen/Qwen-72B-Chat, as well as their Int4 and Int8 versions.
Step 2. Deploy Local Database Service
On your local machine (the machine where you can open the Chrome browser), you will need to deploy a database service to manage your browsing history and conversation history.
Please install the following dependencies if you have not done so already:
# Install dependencies.
git clone https://github.com/QwenLM/Qwen-Agent.git
cd Qwen-Agent
pip install -r requirements.txt
If you have skipped Step 1 and decided to use DashScope's model service, then please execute the following command:
# Start the database service, specifying the model on DashScope by using the --llm flag.
# The value of --llm can be one of the following, in increasing order of resource consumption:
#   - qwen-7b-chat (the same as the open-sourced 7B-Chat model)
#   - qwen-14b-chat (the same as the open-sourced 14B-Chat model)
#   - qwen-turbo
#   - qwen-plus
# "YOUR_DASHSCOPE_API_KEY" is a placeholder. The user should replace it with their actual key.
python run_server.py --api_key YOUR_DASHSCOPE_API_KEY --model_server dashscope --llm qwen-7b-chat --workstation_port 7864
If you have followed Step 1 and are using your own model service instead of DashScope, then please execute the following command:
# Start the database service, specifying the model service deployed in Step 1 with --model_server.
# If the IP address of the machine in Step 1 is 123.45.67.89,
#     you can specify --model_server http://123.45.67.89:7905/v1
# If Step 1 and Step 2 are on the same machine,
#     you can specify --model_server http://127.0.0.1:7905/v1
python run_server.py --model_server http://{MODEL_SERVER_IP}:7905/v1 --workstation_port 7864
Now you can access http://127.0.0.1:7864/ to use the Workstation's Editor mode and Chat mode.
For tips on using the Workstation, please refer to the instructions on the Workstation page or watch the video demonstration.
Step 3. Install Browser Assistant
Install the BrowserQwen Chrome extension:
- Open the Chrome browser and enter
chrome://extensions/in the address bar, then press Enter. - Make sure that the
Developer modein the top right corner is turned on, then click onLoad unpackedto upload thebrowser_qwendirectory from this project and enable it. - Click the extension icon in the top right corner of the Chrome browser to pin BrowserQwen to the toolbar.
Note that after installing the Chrome extension, you need to refresh the page for the extension to take effect.
When you want Qwen to read the content of the current webpage:
- Click the
Add to Qwen's Reading Listbutton on the screen to authorize Qwen to analyze the page in the background. - Click the Qwen icon in the browser's top right corner to start interacting with Qwen about the current page's content.
Video Demonstration
You can watch the following showcase videos to learn about the basic operations of BrowserQwen: